
Audiovisuals
Four step-by-step examples will be shown in short videos, in order to guide the student in creating models.
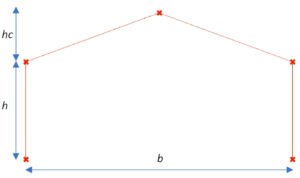
Video 1
In this example, a portico will be parameterized. We are going to see how to configure the Number Sliders, how the Construct Point and the Line type components work, and how to create groups.
This is the model:
Video 2
It is intended to model a ruled surface that corresponds to a hyperbolic paraboloid.
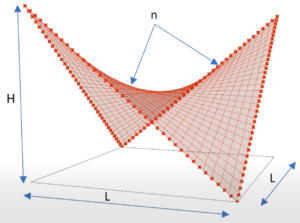
In this video we are going to learn a way to create surfaces, how to hide elements and how the Divide Curve component works.
Video 3
Another ruled surface, but now a hyperboloid.
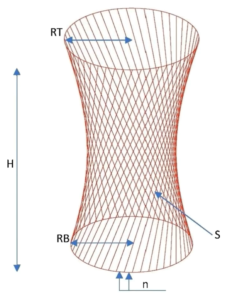
We are going to learn to export our creations to the available formats. Afterwards, it is going to be opened in AutoCAD for checking.
Video 4
We are going to see a BIM model of a building, created in the framework of a Master Thesis, where a roof was modeled using Grasshopper.