
Meshlab
Software installation: The Meshlab software is installed from its own web page https://www.meshlab.net/#download where you can find the download section, where you can download the file to the terminal from the browser itself, then unzip it and start a simple and quick automatic installation.
Post-processing:
Meshlab offers an infinite number of functions for modifying polygonal meshes and point clouds, being able to vary numerous aspects such as the spacing between vertices, the shape of the polygons that make up the mesh, as well as the number of vertices and polygons that make up the model, in addition to numerous texturing and filtering functions.
The first exercise: It consists of generating a Low Poly model. Reducing the existing polygonal mesh.

Once the software is installed and started, go to the top panel and select the view 
Once selected, the following panels will open correspondingly according to the options shown in the images.
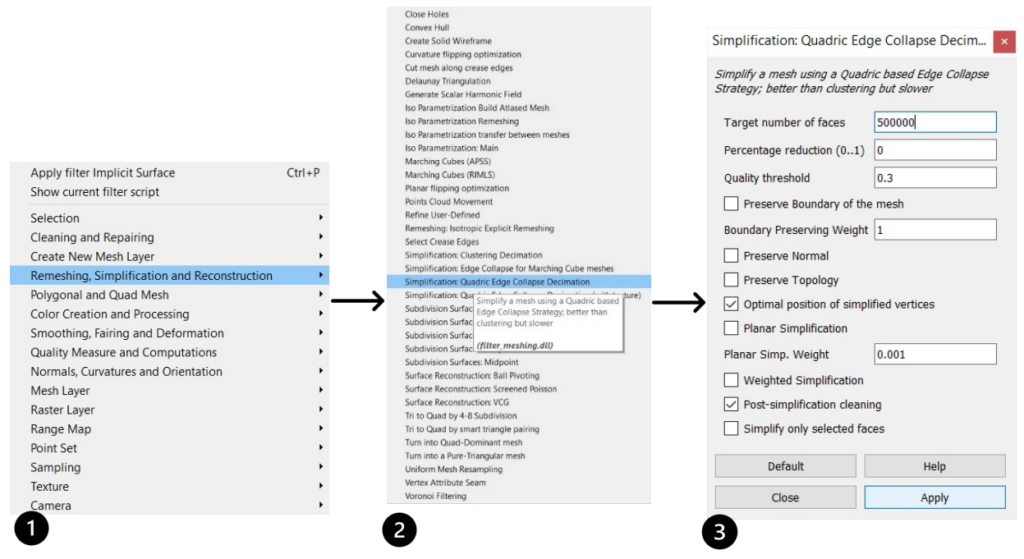
 First of all, after clicking on a general panel will be displayed with divisions that specify the feature or element of the 3D model that you want to transform, in this case, you want to simplify an existing mesh.
 Subsequently, all the options that can help to redo the mesh or alter it quantitatively mainly, as well as tools to close gaps or simplification as in our case, we will select the option “Simplification Quadric Edge Collapse Decimation”.
 Once the tool has been chosen, the last panel will open, where we specify how we want to simplify the mesh, whether in percentage or with a predefined number of faces, in our case we will select the option of the number of faces and we will insert 500,000.
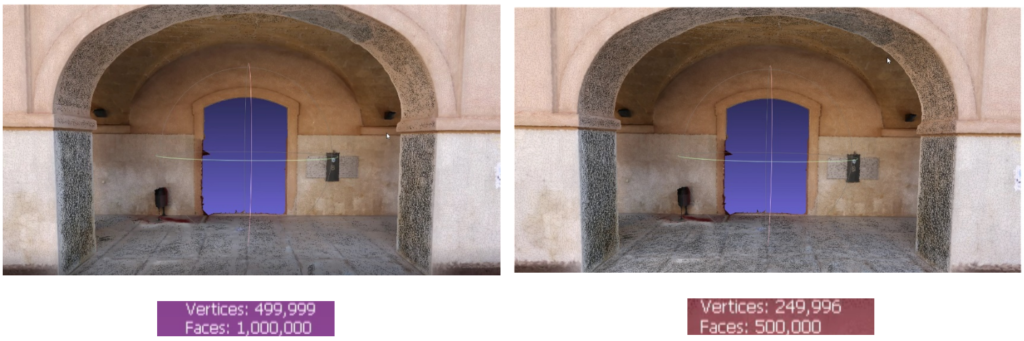
By halving the faces that make up the polygonal mesh, this way, as there are fewer polygons, it indicates that a large number of vertices of the point cloud that has generated the polygonal mesh will not be in use, so these are eliminated, so it is possible to see in the model values how both the mesh and the points are evenly reduced.
The second exercise: It consists of rearranging the polygons of the three-dimensional mesh, resizing them into quadratic shapes.
Once the software is installed and started, go to the top panel and select the view
Once selected, the following panels will open correspondingly according to the options shown in the images.
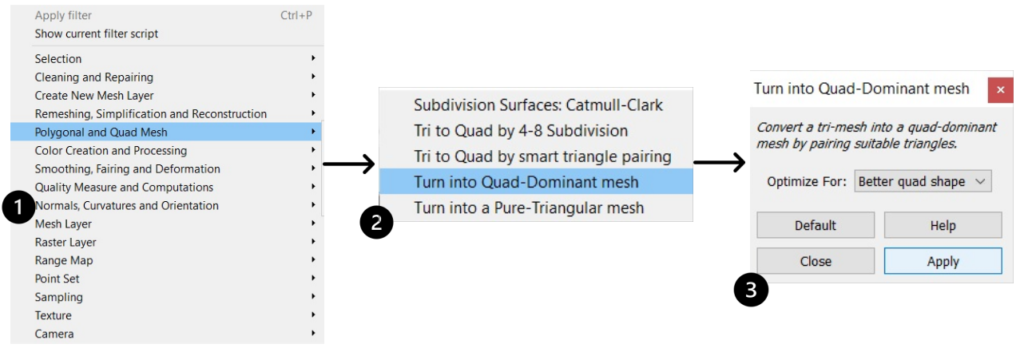
First of all, after clicking on a general panel will be displayed with divisions that specify the feature or element of the 3D model that we want to transform, in this case we want to transform the triangular mesh into a Quad mesh, so we will choose the option “Polygonal and Quad Mes”.
Subsequently, all the options that can help to redo the mesh or alter it quantitatively mainly, as well as mesh subdivision tools or mesh transformations, will be displayed, so we will select the option “Turn into Quad-Dominant mesh”.
Once the tool has been chosen, the last panel will open where in the Optimise section we will select the option “Better quad Shape” to transform the whole mesh.
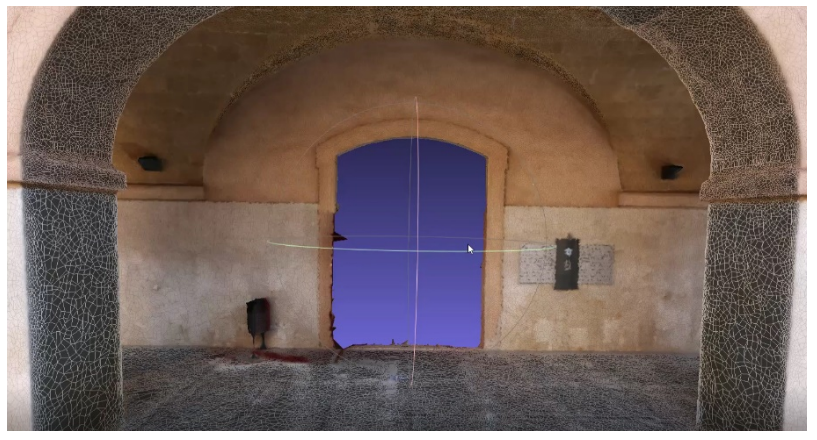
Quad meshes are lighter and optimise the file in good quality/weight ranges. Once this mesh is obtained, the texture should be remeshed if good texture results are desired with this configuration.