
Case Study 2: Space capture
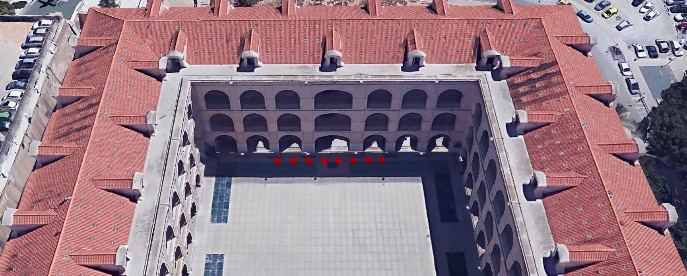
Data capture: The capture of a space, is based on the continuous photographic taking by superimposition from different distances and angles, in order to obtain information such as measurements that the program will perform later to obtain measurements and approximate dimensions.
The routes can be straight or circular, in this case we have used a rectilinear route with several photographs per station, which means that the technician will take photographs located parallel to the canvas that he wants to capture taking from each position several photographs of the environment collecting great information of the exterior of the structure mainly, another route practiced is the semicircular used to capture the interior and exterior of the arches and vaults achievement.

Software installation: The Reality Capture software is installed from its website https://www.capturingreality.com/DownloadNow It is necessary to register to use it, because although the information processing and editing is free, if you want to download the photogrammetric project, you must pay a small fee. It is possible to register using Google Account, Facebook or your Epic Games account if you have one.
Processing with Simulated Error:

Beginning with the settings  , it is advisable to set the Image Overlap to Low or Medium if you have not taken a large number of photos.
In the example a photogrammetric capture with 85 photographs is prepared, where we obtain a good point alignment of the façade with passing arches, so we proceed to the next step of the Workflow.
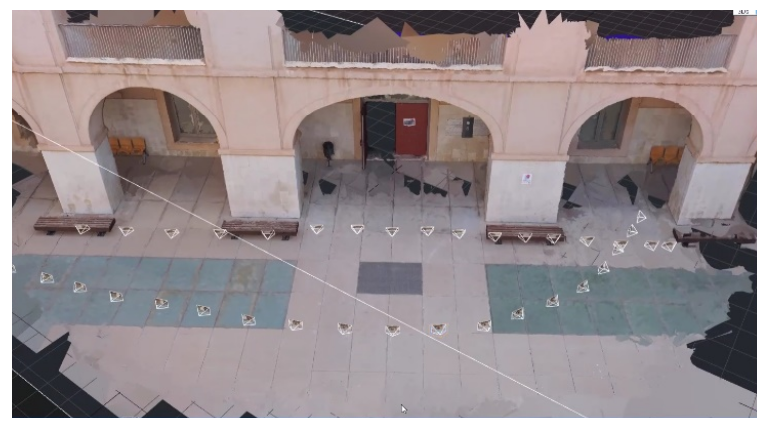
We continue the processing by selecting the  section where we will obtain the polygonal mesh of the point cloud by joining these, which act as vertices of the polygons generated. When we obtain the three-dimensional model, we can observe various conditions that the polygonal mesh has, for example:
- At the distal ends of the arch the quality is lost, while it gradually increases towards the central arch with the gate. This is due to the fact that this was our capture objective, so the rest are residual point creations.
- We must take into account that the photographed element is composed of 2 clearly recognizable spaces, firstly the exterior area of the façade with arches and secondly the interior space of the arcades, a porch covered by a vault, so that areas not visible in the photographs may not be picked up, generating gaps in the polygonal mesh or may be recreated with a negligible quality.
It is therefore necessary to return to the site and capture new photographs in order to complete the information not represented.
A good way to prevent some of these alterations is to generate a point cloud of draf preview model, made by a quick processing to obtain important visual information in a few minutes, it is a good tool to process in situ and not have to move later.
Final processing:
After having taken the photographs, we created a new project with all of them, loading a total of 193 images into the program.
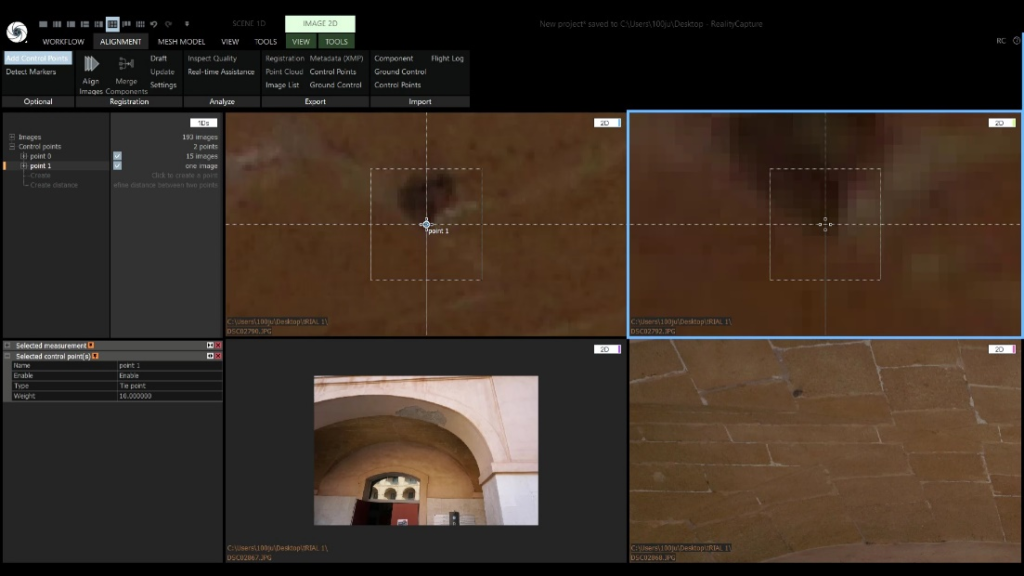
To help align the photographs, control points must be added by manually selecting them within each photograph, helping to join the components together.
To do this, start by selecting the section in the top bar and then divide the screen layout into 4 segments using the icon that mimics the result, found in the top bar in the left corner.
This action will divide the layout screen into 4 parts, then we select the screens one by one with the and assign to each of them a corresponding command, to assign to each of the screens a colour.
- Screen 1: CTRL+1.

- Screen 2: CTRL+2.

- Screen 3: CTRL+3.

- Screen 4: CTRL+4.

We proceed to drag from the images panel of the left table photographs to each of the 4 cells of the layput, being able to make a tour of all the photographs of the project, when we find a common element in numerous photographs click on it in each of the boxes, you can use the Zoom to have more precision, it is very important to perform this process accurately so it has to be an elementeo captured in several photographs easy to select and not rerpesente blurred. Once you select the element in the 4 images you can continue looking for the same element in the following images by dragging the next 4 images to each of the cells of the layout and repeating the process consecutively.
The greater the number of photographs that record a point, the more accurately it will be represented, likewise, the greater the number of points added, the more accurately the project will be aligned.
IMPORTANT, ONCE THE STITCHING PROCESS IS DONE, IT IS NECESSARY TO PERFORM THE PROCEDURE FROM ALIGNMENT.
SCHEME:
Once the control points are collected, we proceed to perform the same treatment of tools and in the same order as before, to obtain our 3D product.
