
Clash Detection
This video shows how to use the Model Coordination module in BIM Collaborate Pro to automatically perform Clash Detection on all models shared by the project team. With this tool, project members can view, manage, and resolve issues.
Based on the Revit models uploaded earlier (.rvt files Tutorial VII.3 – BIM Architecture And Terrain Models With Revit and Tutorial VII.4 – BIM MEP Model With Revit) and following the steps shown in the video above, a coordination space will be created to verify possible clashes between the Architecture model and the MEP model.
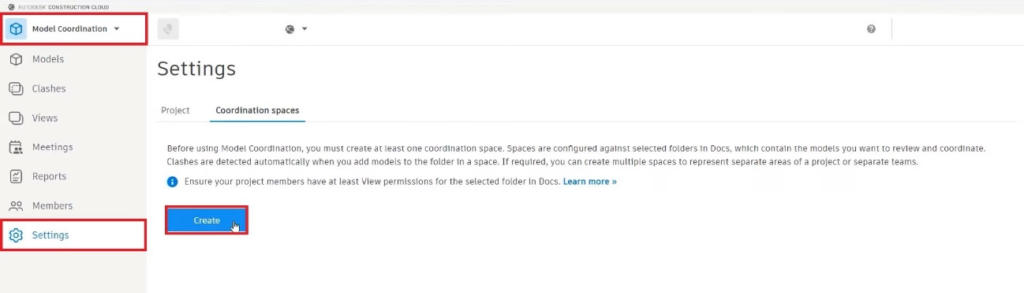
As indicated in the video, you must access the Model Coordination module. In Settings, you must click on “Create” to create a new Coordination Space.
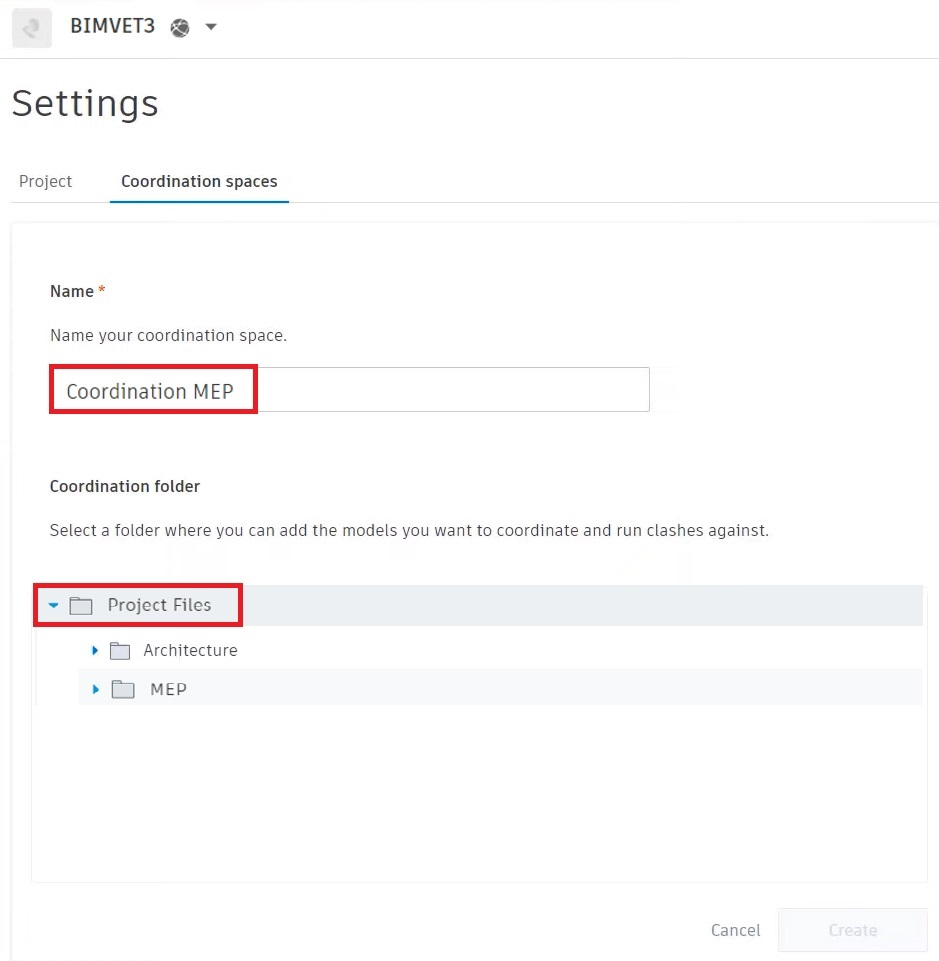
Next, you must name the Coordination Space, and select the folder to which you can add models to coordinate and use for Clash Detection.
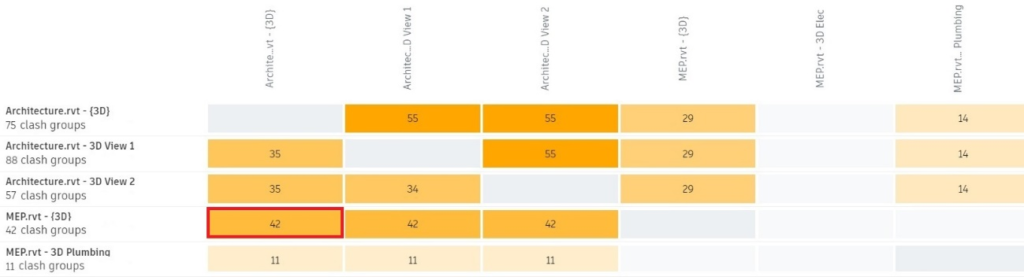
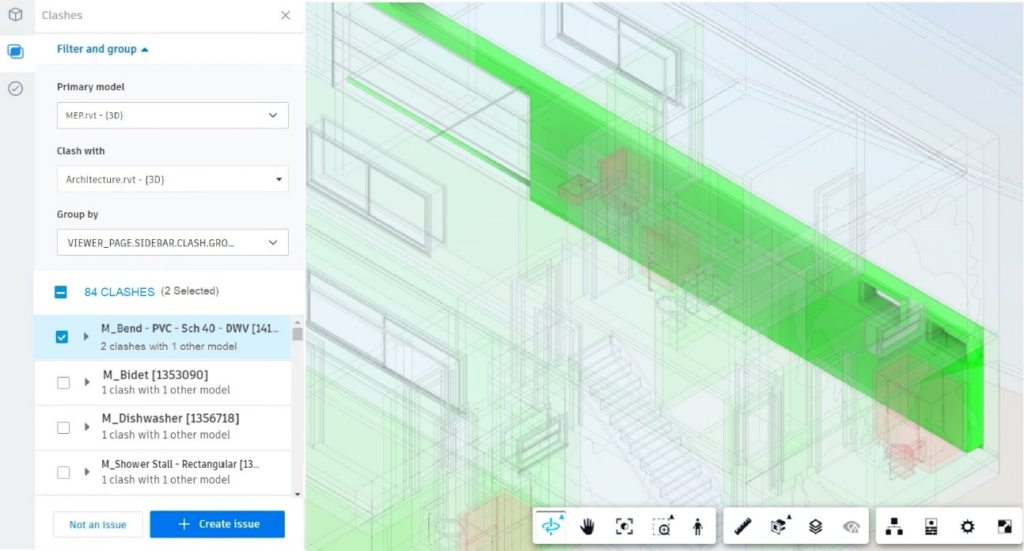
After that, you must access the “Clashes” menu in which a matrix of Clash Detection results will be displayed.
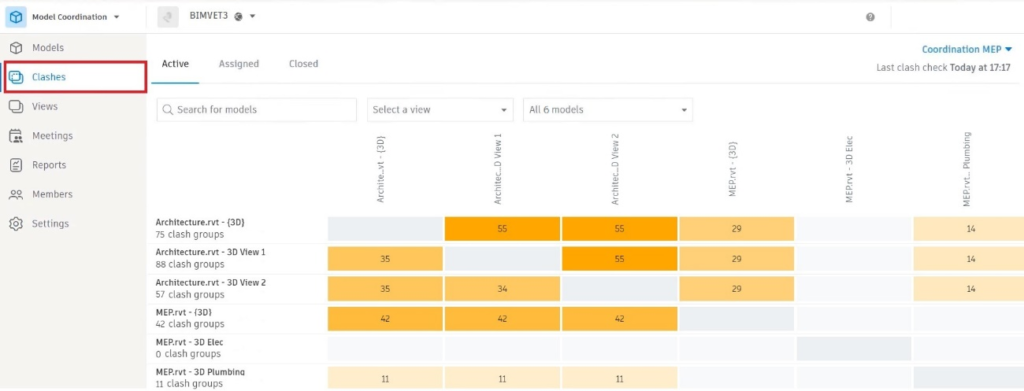
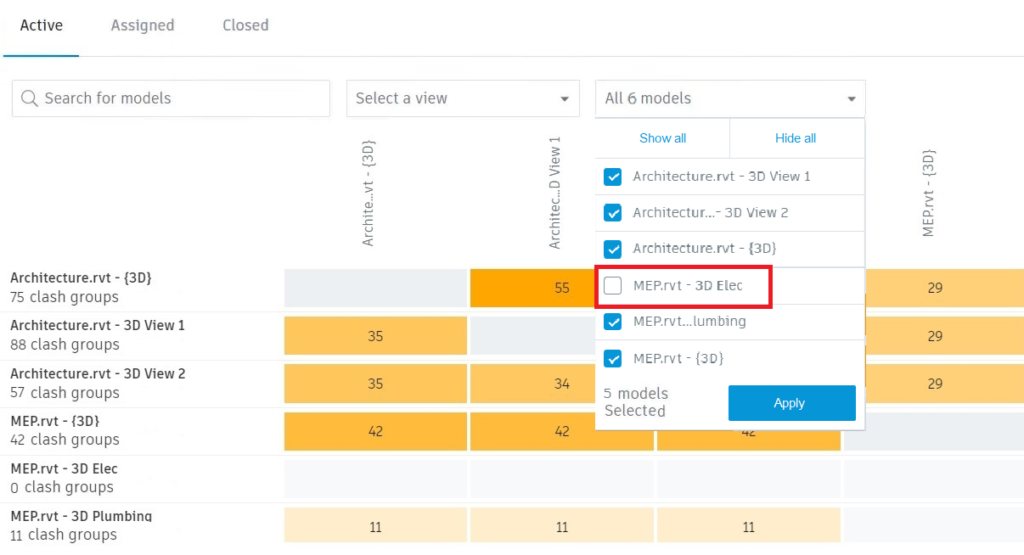
The matrix shows the number of clashes between the models based on the files contained in the selected folder. You can select the models to display in the matrix, in this case you can clear the template “MEP.rvt – 3D Elec”, because in the previously loaded file there is no electrical design element, so no clashes will appear.
Clicking on the matrix number will display the possible clashes found in a 3D model. As a demonstration, clashes between the model “MEP.rvt” and “Architecture.rvt” will be used, as shown below:
A page will load that displays the 3D model, with possible clashes found identified by colours.
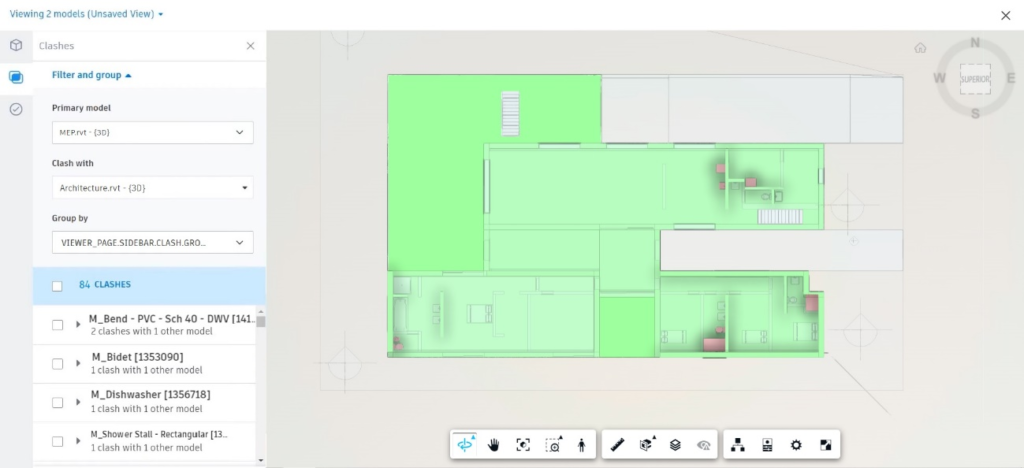
In the lower toolbar, some tools are located that make it easier to navigate the model.

- Orbit: allows you to orbit the 3D view with mouse movement (this function can also be performed through the view cube located in the upper right corner).
- Pan: Allows you to drag the view of the model with the mouse movement, without orbiting it.
- Adjust view: Returns to the full 3D view of the model.
- Zoom window: Allows you to select a specific area of the model to zoom in.
- First person: It is an interesting tool in 3D visualization, as it allows the user to visualize the model as if it were really inside the building.
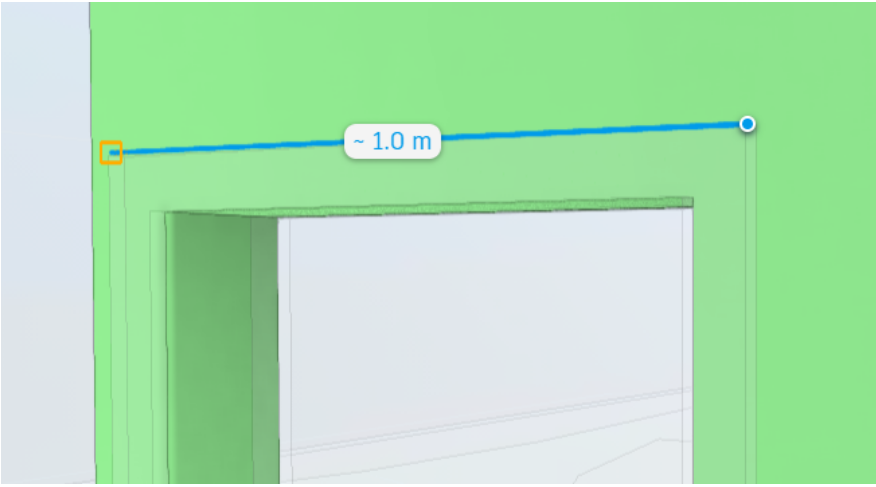
- Measure: Allows you to measure the distance between two points.
- Add section plane: Allows you to add planes (in X, Y, or Z) or create a Section Box to crop a particular view of the model.

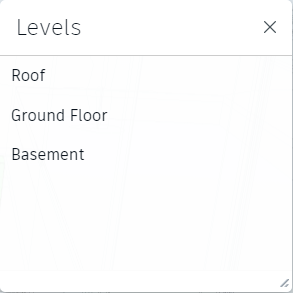
- Levels: Allows the user to select which level of the model to view.
- View issues: Allowsyou to view the problems already assigned to the model (in this case, not yet).
- Template browser: Allows you to hide/display model elements
- Properties: Displays the properties of the selected element.
- Settings: Allows the user to customize navigation, appearance, and environment settings according to preferences.
- Full screen: full-screen view of the 3D model.
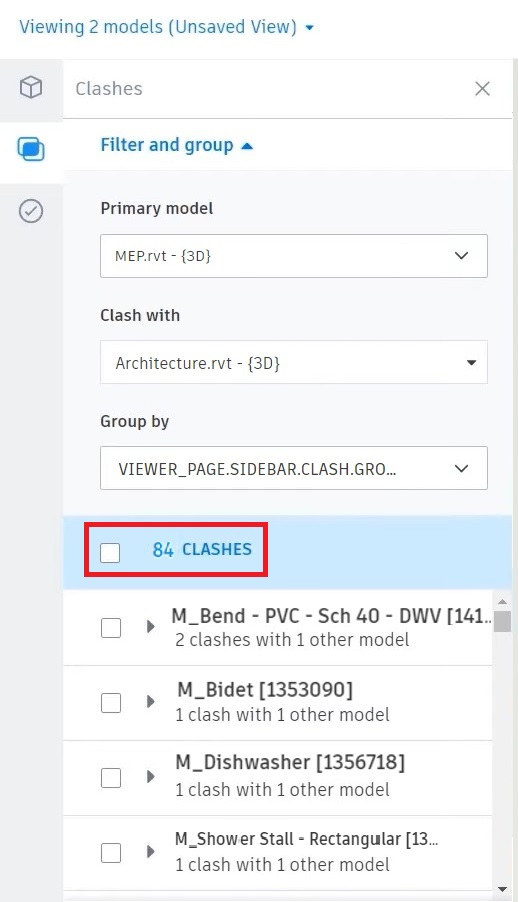
Now that you know the main navigation tools, you can start analysing the clashes detected. Between these two models, 84 clashes were pointed out.
Note: It is important to note that the clashes demonstrated in this tutorial may be different, as it depends on how the cold-water network was developed by each student in Tutorial VII.4 – BIM MEP Model With Revit.
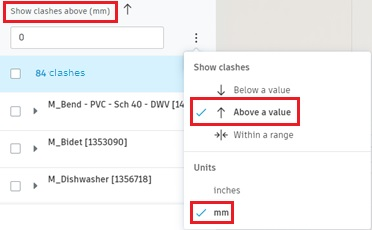
In “Show clashes above” you can select the unit of measure (will be kept in mm) and also the accuracy of the test (above, below or exactly certain value, will be kept 0mm)
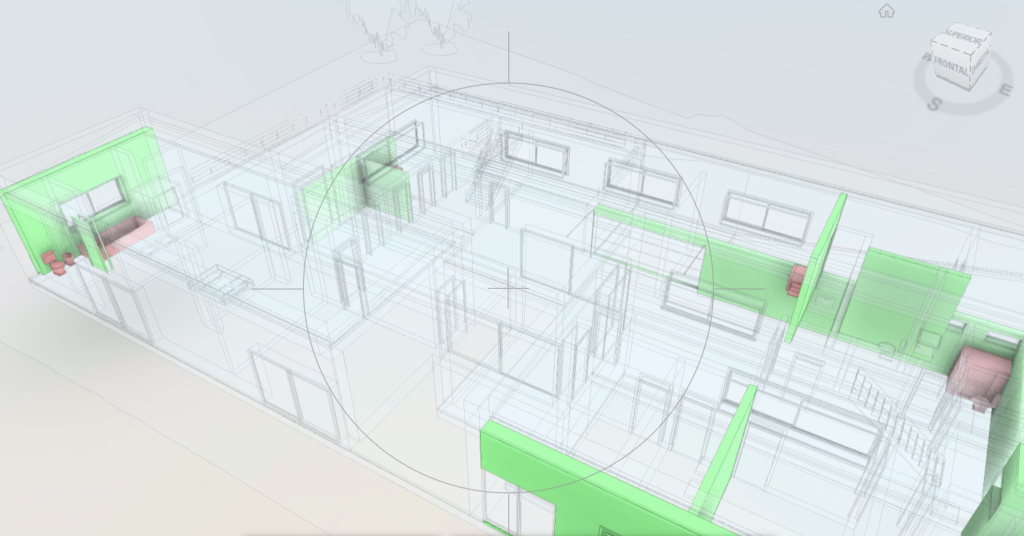
When you mark one of the clashes shown in the list, the 3D view is automatically positioned to show the element that is in potential clash.
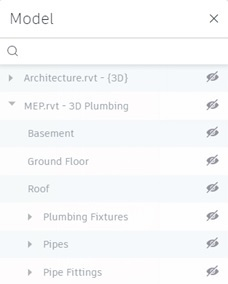
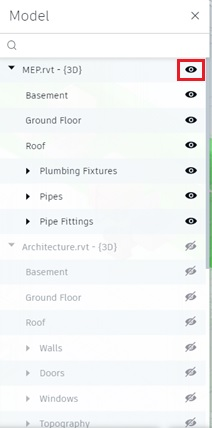
The preview is not very clear, so to improve it you must select the Model Browser tool![]() , and mark the MEP option, so that the MEP elements model are visible.
, and mark the MEP option, so that the MEP elements model are visible.
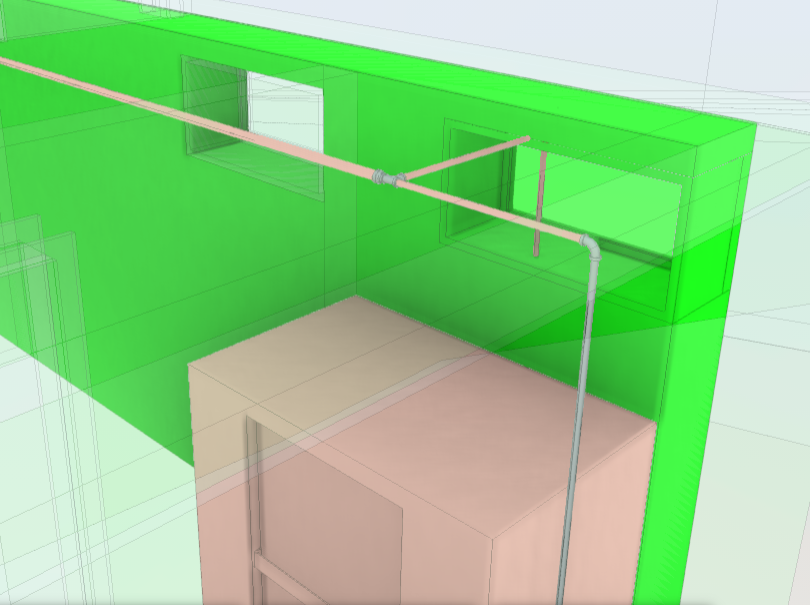
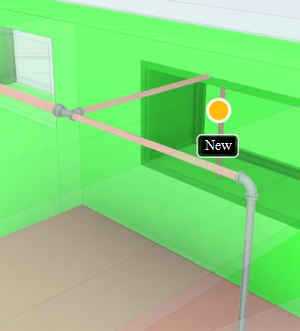
Now it is already possible to better visualize the pipes and plumbing fixtures. It is noted that there is a pipe that passes through a window opening.
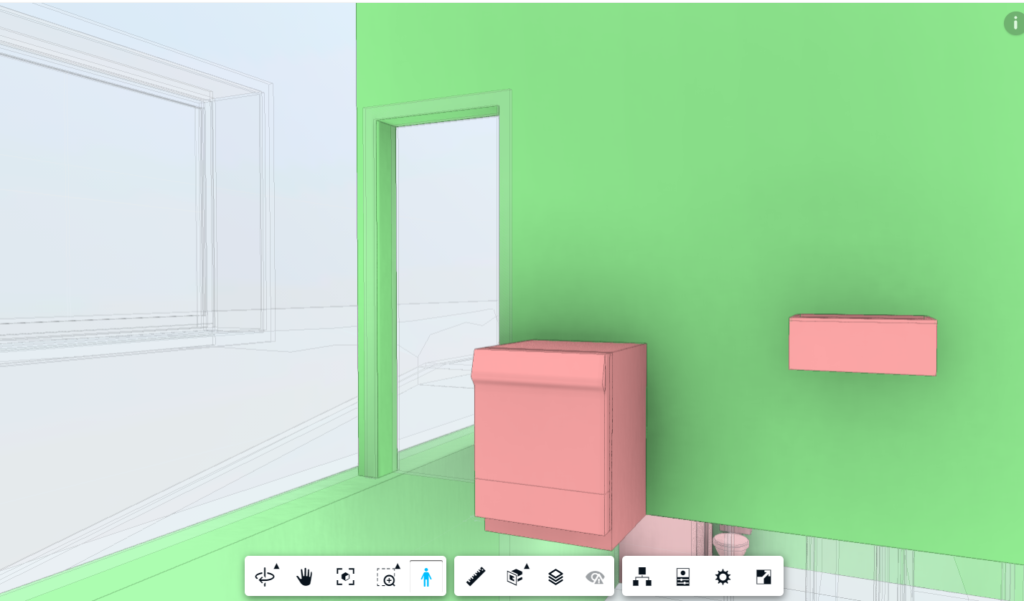
In this case, there are two options, ignore the clash and select the option “Not an issue”, or else choose the option “Create issue” to fix it. Both situations will be exemplified below.

When you select the “Not an issue” option, you must assign a Title and also a Reason. Some possible reasons why the location is not an issue are suggested. You can also add comments.
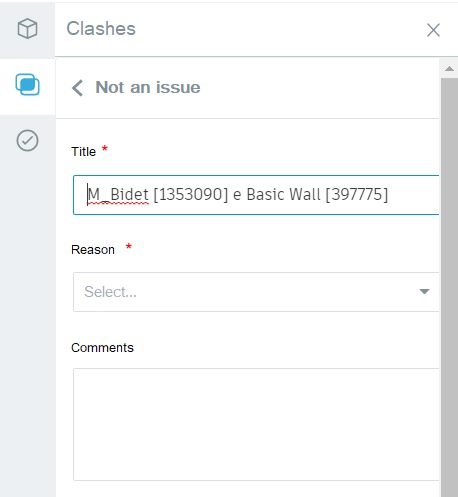
Click on “Cancel” to return to the previous page.
By clicking on the “Create issue” option, you will then be prompted to insert a pin into the element to be modified, as in the image below.
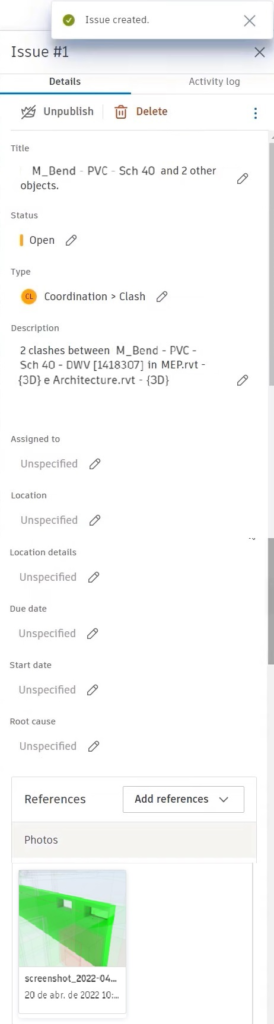
On the right side of the page, a window will open to fill in with information about the issue created. When working in teams and the issues are assigned to other members, it is very important that the issue information is filled with as much details as possible, so that the other member knows exactly what should be done to fix the issue.
It is recommended that all possible clashes between all models of the matrix be visualized and evaluated, and to classify them as a problem or not.
The solution of the problems found is done directly in the model in Revit, that is, you must resize the network layout and/or reposition the plumbing fixtures according to the clashes detected in the Revit work environment. After saving the edited template in Revit, it will automatically update in BIM Collaborate Pro.
After the corrections have been made, you must recheck the clashes in the model on BIM Collaborate Pro.